ようこそ、バーボンハウスへ。
   ∧_∧ やあ              このテキーラはサービスだから、
   (´・ω・`)       /           まず飲んで落ち着いて欲しい。
  /∇y:::::::\   [ ̄ ̄]          うん、「また」なんだ。済まない。
  |:::⊃:|:::::::::::::|   |──|           仏の顔もって言うしね、
 ̄ ̄ ̄ ̄ ̄ ̄ ̄ ̄ ̄ ̄ ̄ ̄ ̄ ̄ ̄ ̄ ̄| 謝って許してもらおうとも思っていない。
 ̄ ̄ ̄ ̄ ̄ ̄ ̄ ̄ ̄ ̄ ̄ ̄ ̄ ̄ ̄| ̄ ̄ 
 ̄ ̄ ̄ ̄ ̄ ̄ ̄ ̄ ̄ ̄ ̄ ̄ ̄ ̄/|    でも、このスレタイを見たとき、君は、
    ∇ ∇ ∇ ∇      /./|   きっと言葉では言い表せない
    ┴ ┴ ┴ ┴     / / .|   「ときめき」みたいなものを
 ̄ ̄ ̄ ̄ ̄ ̄ ̄ ̄ ̄ ̄ ̄ ̄|/   |   感じてくれたと思う。殺伐とした世の中で、
 ̄ ̄ ̄ ̄ ̄ ̄ ̄ ̄ ̄ ̄ ̄ ̄     |   そういう気持ちを忘れないで欲しい
   (⊆⊇) (⊆⊇) (⊆⊇)      |   そう思って、このスレを立てたんだ。
     ||    ||    .||       |   
   ./|\  /|\  /|\          じゃあ、注文を聞こうか。
とりあえず、作成したプロジェクトをGitHubに登録しておくことにした。
自分はgitbashを使っているので、手順はこんな感じになった。

まず、gitbashが勝手に改行コードを変換しないように設定する。
git config --global core.autocrlf false

そのあとにローカルのリポジトリを初期化してコミットしてプッシュ。
cd check_2ch/
git init
git add .
git commit -m "Initialize repository"
git remote add origin https://github.com/oretanegi/check_2ch.git
git push -u origin master
まず、Vagrantfileにポートフォワーディンングの設定をした。

config.vm.network "forwarded_port", guest: 3000, host: 3000

でも、なぜか、どうやってもWindows側からgestで起動しているWEBrickにアクセスできないため、(nginxは普通にアクセスできる)、
仕方なくnginxからreverse proxyでWEBrickにアクセスさせることにした。

●Vagrantfileの設定を変更
config.vm.network "forwarded_port", guest: 3001, host: 3000

●nginxにreverse proxyの設定をする
server {
    listen       3001;
    server_name  localhost;

    #charset koi8-r;
    #access_log  /var/log/nginx/log/host.access.log  main;
    proxy_set_header Host $http_host;
    location / {
#        root   /usr/share/nginx/html;
#        index  index.html index.htm;
         proxy_pass http://localhost:3000;
    }


ちょっとまわりくどい感じがするけど、同じport3000で動かしているのに
なぜかWEBrickの方だけアクセスできないので仕方なくこうなったんだよね。
前回、Raisの勉強をはじめたつもりが、実はまだ始まってなかったようで、いつの間にかRailsのバージョンが4に。。。
とりあえず、今回はRVMでインストールしてみよう。

●rvmのインストール
[vagrant@localhost ~]$ curl -L get.rvm.io | bash -s stable

ではいるはずだけどエラーが出て怒られた。。。
エラーの内容に「これを試してみれ」と書いてあったので実行。
[vagrant@localhost ~]$  gpg2 --keyserver hkp://keys.gnupg.net --recv-keys 4170B82D39DC0E303113804B9B6B1796C275462A

[vagrant@localhost ~]$  curl -L get.rvm.io | bash -s stable
今度は上手くインストールできた。

.bash_profileにrvmのパスの設定が勝手に追加されているので有効にします。
[vagrant@localhost ~]$  source .bash_profile

●rubyのインストール
[vagrant@localhost ~]$  rvm install 2.1.5

ちゃんと入ったっぽい
[vagrant@localhost ~]$ ruby -v
ruby 2.1.5p273 (2014-11-13 revision 48405) [x86_64-linux]

●rails4用のgemの設定を追加
[vagrant@localhost ~]$ rvm gemset create rails4
ruby-2.1.5 - #gemset created /home/vagrant/.rvm/gems/ruby-2.1.5@rails4
ruby-2.1.5 - #generating rails4 wrappers........
[vagrant@localhost ~]$ rvm gemset use rails4 --default
Using ruby-2.1.5 with gemset rails4
[vagrant@localhost ~]$ rvm gemset list

gemsets for ruby-2.1.5 (found in /home/vagrant/.rvm/gems/ruby-2.1.5)
   (default)
   global
=> rails4

●railsのインストール
[vagrant@localhost ~]$ gem install rails --version "4.2.0" --nori --no-rdoc

●プロジェクトの作成
[vagrant@localhost ~]$  mkdir -p projects/rails
[vagrant@localhost ~]$  cd projects/rails/
[vagrant@localhost ~]$  rails new check_2ch

エラーが出て怒られたので、sqlite-develのインストール。
[vagrant@localhost ~]$  sudo yum install sqlite-devel

[vagrant@localhost ~]$  rails new check_2ch
今度は上手くいった

[vagrant@localhost ~]$  cd check_2ch/
[vagrant@localhost ~]$  bundle update
[vagrant@localhost ~]$  bundle install
[vagrant@localhost ~]$  rails server

エラーが出て怒られたので Gemfileを編集
[vagrant@localhost ~]$  vi Gemfile
# gem 'therubyracer',  platforms: :ruby ← コメントを外す
[vagrant@localhost ~]$  bundle update
[vagrant@localhost ~]$  bundle install
[vagrant@localhost ~]$  rails server
ちゃんとport3000で動いた。


今回はまず、参考書のサンプルプログラムを
Rails上で動かしてみることにした。
(「作りながら覚えるHTML5+Javascriptプログラミング」の神経衰弱

●まず、コントローラーの作成
rails generate controller Html5demo index

●メソッドの追加
# concentrationの追加(そもそも手動で追加するもんなのか?
class Html5demoController < ApplicationController
  def index
  end
 
  def concentration
   
  end
end

●テンプレートの追加
app/views/html5demo/concentration.html.erb
(中身は参考書のやつからパクってくる

●とりあえずアクセスしてみる
http://sabakan.org:3000/html5demo/concentration/

あれ? rails routing errorって表示される???

ググッて調べてみると
config/routes.rbを編集しないといけないっぽい。
「get "html5demo/concentration"」を追加。

もう一回アクセスしたら、ちゃんとテンプレートの中身が表示された。

●jsとcssの追加
app/assets/javascripts/concentration.js
app/assets/stylesheets/concentration.css

●画像の追加
app/assets/images/concentration/ の中に画像を全部ぶち込んでおく

concentration.jsの中の画像のパスは
/assets/concentration/に修正する。
(imagesはいらない

●app/assets/javascripts/applicationの修正
//= require concentration を追加

●もう一回アクセス
ちゃんとひょうじされました。
step5-8.png
中身の解析はまた後で。


ググっても、役に立ちそうなサイトが殆ど見つからなかったので、とりあえず、
いろいろ試して見ようと思う。

まず、DBの作成とユーザーの作成。
mysql> CREATE DATABASE `depot` DEFAULT CHARACTER SET utf8 COLLATE utf8_general_ci;
Query OK, 1 row affected (0.49 sec)

mysql> GRANT ALL PRIVILEGES ON `depot` . * TO 'depot'@'localhost' WITH GRANT OPTION;
Query OK, 0 rows affected (0.31 sec)

mysql> set password for depot@localhost=password('depot');
Query OK, 0 rows affected (0.13 sec)

mysql> FLUSH PRIVILEGES;

次に、config/database.ymlを編集する。
development:  adapter: mysql2
  encoding: utf8
  database: depot
  pool: 5  username: depot
  password:depot
  socket: /tmp/mysql-1.sock

モデルクラスを作成する。
[taka@centos6 depot]$ rails generate scaffold Product title:string description:text image_url:string price:decimal

なんかエラーがでて怒られたので

[root@centos6 ~]# gem install activerecord-mysql2-adapter

Gemfileの
gem 'sqlite3' を gem 'mysql2' に書き換えて、もう一回
[taka@centos6 depot]$ rails generate scaffold Product title:string description:text image_url:string price:decimal
今度は上手くいった。

次はマイグレーション。
[taka@centos6 depot] $rake db:migrate

テーブルを確認してみよう。
mysql> show create table products;
+----------+------------------------------------------------------------------------------------------------------------------------------------------------------------------------------------------------------------------------------------------------------------------------------------------------------------------------------------------+
| Table    | Create Table                                                                                                                                                                                                                                                                                                                             |
+----------+------------------------------------------------------------------------------------------------------------------------------------------------------------------------------------------------------------------------------------------------------------------------------------------------------------------------------------------+
| products | CREATE TABLE `products` (
  `id` int(11) NOT NULL AUTO_INCREMENT,
  `title` varchar(255) DEFAULT NULL,
  `description` text,
  `image_url` varchar(255) DEFAULT NULL,
  `price` decimal(8,2) DEFAULT NULL,
  `created_at` datetime NOT NULL,
  `updated_at` datetime NOT NULL,
  PRIMARY KEY (`id`)
) ENGINE=InnoDB DEFAULT CHARSET=utf8 |
+----------+------------------------------------------------------------------------------------------------------------------------------------------------------------------------------------------------------------------------------------------------------------------------------------------------------------------------------------------+
1 row in set (0.00 sec)

おー テーブルが出来てる。

次はレコードのインサートができるか試して見よう。
http://sabakan.org:3000/products/
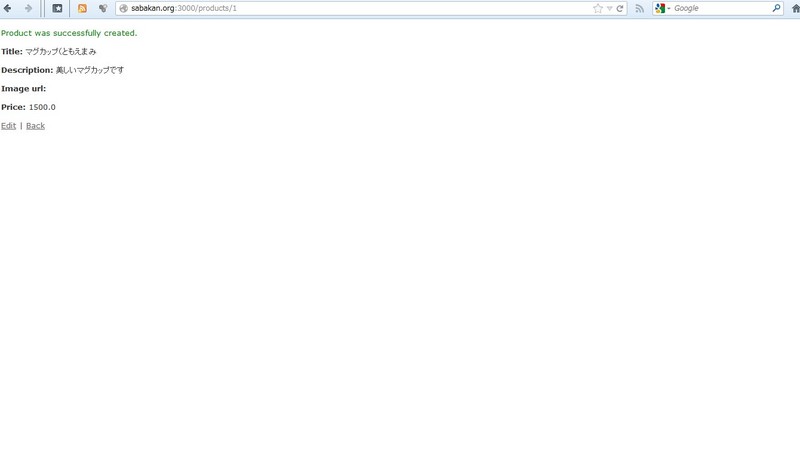
products.jpg

レコードのインサートも問題ないようだ。
mysql> select * from products;
+----+-----------------------------------+--------------------------------+-----------+---------+---------------------+---------------------+
| id | title                             | description                    | image_url | price   | created_at          | updated_at          |
+----+-----------------------------------+--------------------------------+-----------+---------+---------------------+---------------------+
|  1 | マグカップ(ともえまみ            | 美しいマグカップです           |           | 1500.00 | 2012-10-07 07:00:17 | 2012-10-07 07:00:17 |
+----+-----------------------------------+--------------------------------+-----------+---------+---------------------+---------------------+
1 row in set (0.00 sec)

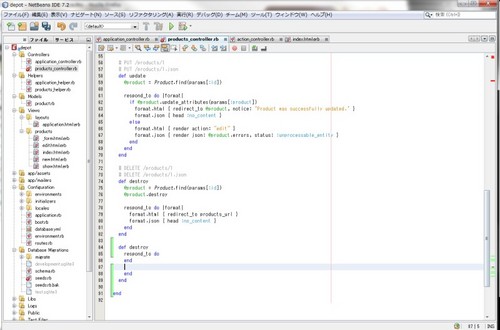
app/controllers/products_controller.rbを覗いてみよう。

class ProductsController < ApplicationController
  # GET /products
  # GET /products.json
  def index
    @products = Product.all

    respond_to do |format|
      format.html # index.html.erb
      format.json { render json: @products }
    end
  end

  # GET /products/1
  # GET /products/1.json
  def show
    @product = Product.find(params[:id])

    respond_to do |format|
      format.html # show.html.erb
      format.json { render json: @product }
    end
  end

  # GET /products/new
  # GET /products/new.json
  def new
    @product = Product.new

    respond_to do |format|
      format.html # new.html.erb
      format.json { render json: @product }
    end
  end

  # GET /products/1/edit
  def edit
    @product = Product.find(params[:id])
  end

  # POST /products
:


ふーん。
へぇー。 なるほど。

自分は普段からNetbeansを使っているのでRailsでも
使うことにした。
ググって調べたらNetbeans7.2の場合はこれ
https://blogs.oracle.com/geertjan/resource/nb-72-community-ruby.xml
をプラグインの設定に使えばいいらしい。
あとは自力で突破してね。

netbeans_rails.jpg
なぜか、SFTPで自動アップロードの設定は出来ないっぽい。
リポジトリはgitを使ってるけど、編集部分が黄緑色で分かるようになっているのは
PHPを編集しているときと同じ。

やっぱり別のエディタに使用かな。

コントローラーとアクションを作成するのは簡単です。

[taka@centos6 demo]$ rails generate controller Say hello goodbye
      create  app/controllers/say_controller.rb
       route  get "say/goodbye"
       route  get "say/hello"
      invoke  erb
      create    app/views/say
      create    app/views/say/hello.html.erb
      create    app/views/say/goodbye.html.erb
      invoke  test_unit
      create    test/functional/say_controller_test.rb
      invoke  helper
      create    app/helpers/say_helper.rb
      invoke    test_unit
      create      test/unit/helpers/say_helper_test.rb
      invoke  assets
      invoke    coffee
      create      app/assets/javascripts/say.js.coffee
      invoke    scss
      create      app/assets/stylesheets/say.css.scss

最小限の定義だけです。
[taka@centos6 demo]$ less app/controllers/say_controller.rb
class SayController < ApplicationController
  def hello
  end

  def goodbye
  end
end

あとは、http://sabakan.org:3000/say/hello のようにアクセスすればいいです。

rake about のチェックが問題なかったので、demoアプリを起動してみる。

[taka@centos6 demo]$ rails server
=> Booting WEBrick
=> Rails 3.2.8 application starting in development on http://0.0.0.0:3000
=> Call with -d to detach
=> Ctrl-C to shutdown server
[2012-09-30 12:26:48] INFO  WEBrick 1.3.1
[2012-09-30 12:26:48] INFO  ruby 1.9.3 (2012-04-20) [i686-linux]
[2012-09-30 12:26:48] INFO  WEBrick::HTTPServer#start: pid=32668 port=3000


Started GET "/assets/rails.png" for 192.168.1.14 at 2012-09-30 12:27:10 +0900
Connecting to database specified by database.yml
Served asset /rails.png - 200 OK (7ms)

おおお!
ちゃんと起動してますね!!
rails_demo.jpg

rails newでアプリケーションの雛形を作成した後は、
まず、インストール状況を確認するコマンドを実行する必要があるらしい。

[taka@centos6 demo]$ rake about
rake aborted!
Could not find a JavaScript runtime. See https://github.com/sstephenson/execjs for a list of available runtimes.

(See full trace by running task with --trace)

またエラーが出て怒られた・・・。
ググって調べてみると、GemFileに

gem 'execjs'
gem 'therubyracer'

を追加してbundle installを実行すればいいらしい。

もう一回
>rake about
[taka@centos6 demo]$ rake about
About your application's environment
Ruby version              1.9.3 (i686-linux)
RubyGems version          1.8.23
Rack version              1.4
Rails version             3.2.8
JavaScript Runtime        therubyracer (V8)
Active Record version     3.2.8
Action Pack version       3.2.8
Active Resource version   3.2.8
Action Mailer version     3.2.8
Active Support version    3.2.8
Middleware                ActionDispatch::Static, Rack::Lock, #<ActiveSupport::Cache::Strategy::LocalCache::Middleware:0x9b620fc>, Rack::Runtime, Rack::MethodOverride, ActionDispatch::RequestId, Rails::Rack::Logger, ActionDispatch::ShowExceptions, ActionDispatch::DebugExceptions, ActionDispatch::RemoteIp, ActionDispatch::Reloader, ActionDispatch::Callbacks, ActiveRecord::ConnectionAdapters::ConnectionManagement, ActiveRecord::QueryCache, ActionDispatch::Cookies, ActionDispatch::Session::CookieStore, ActionDispatch::Flash, ActionDispatch::ParamsParser, ActionDispatch::Head, Rack::ConditionalGet, Rack::ETag, ActionDispatch::BestStandardsSupport
Application root          /home/taka/demo
Environment               development
Database adapter          sqlite3
Database schema version   0

今度は上手くいったようだ。